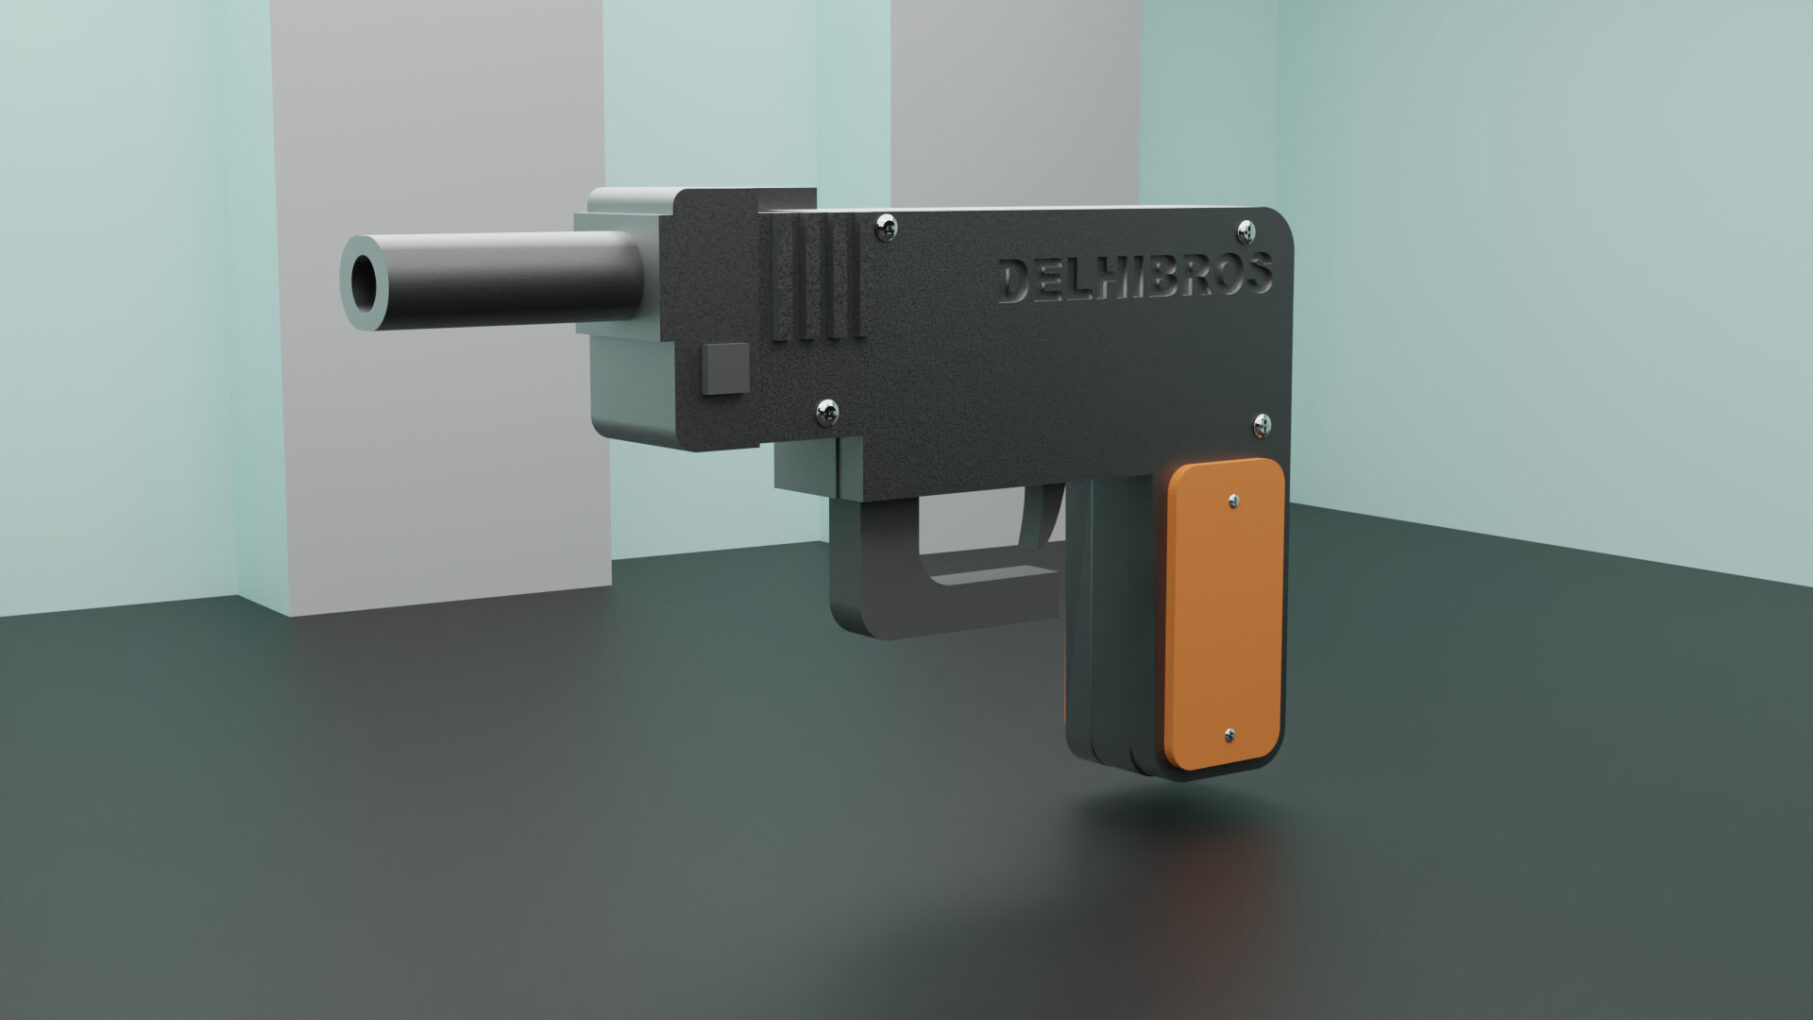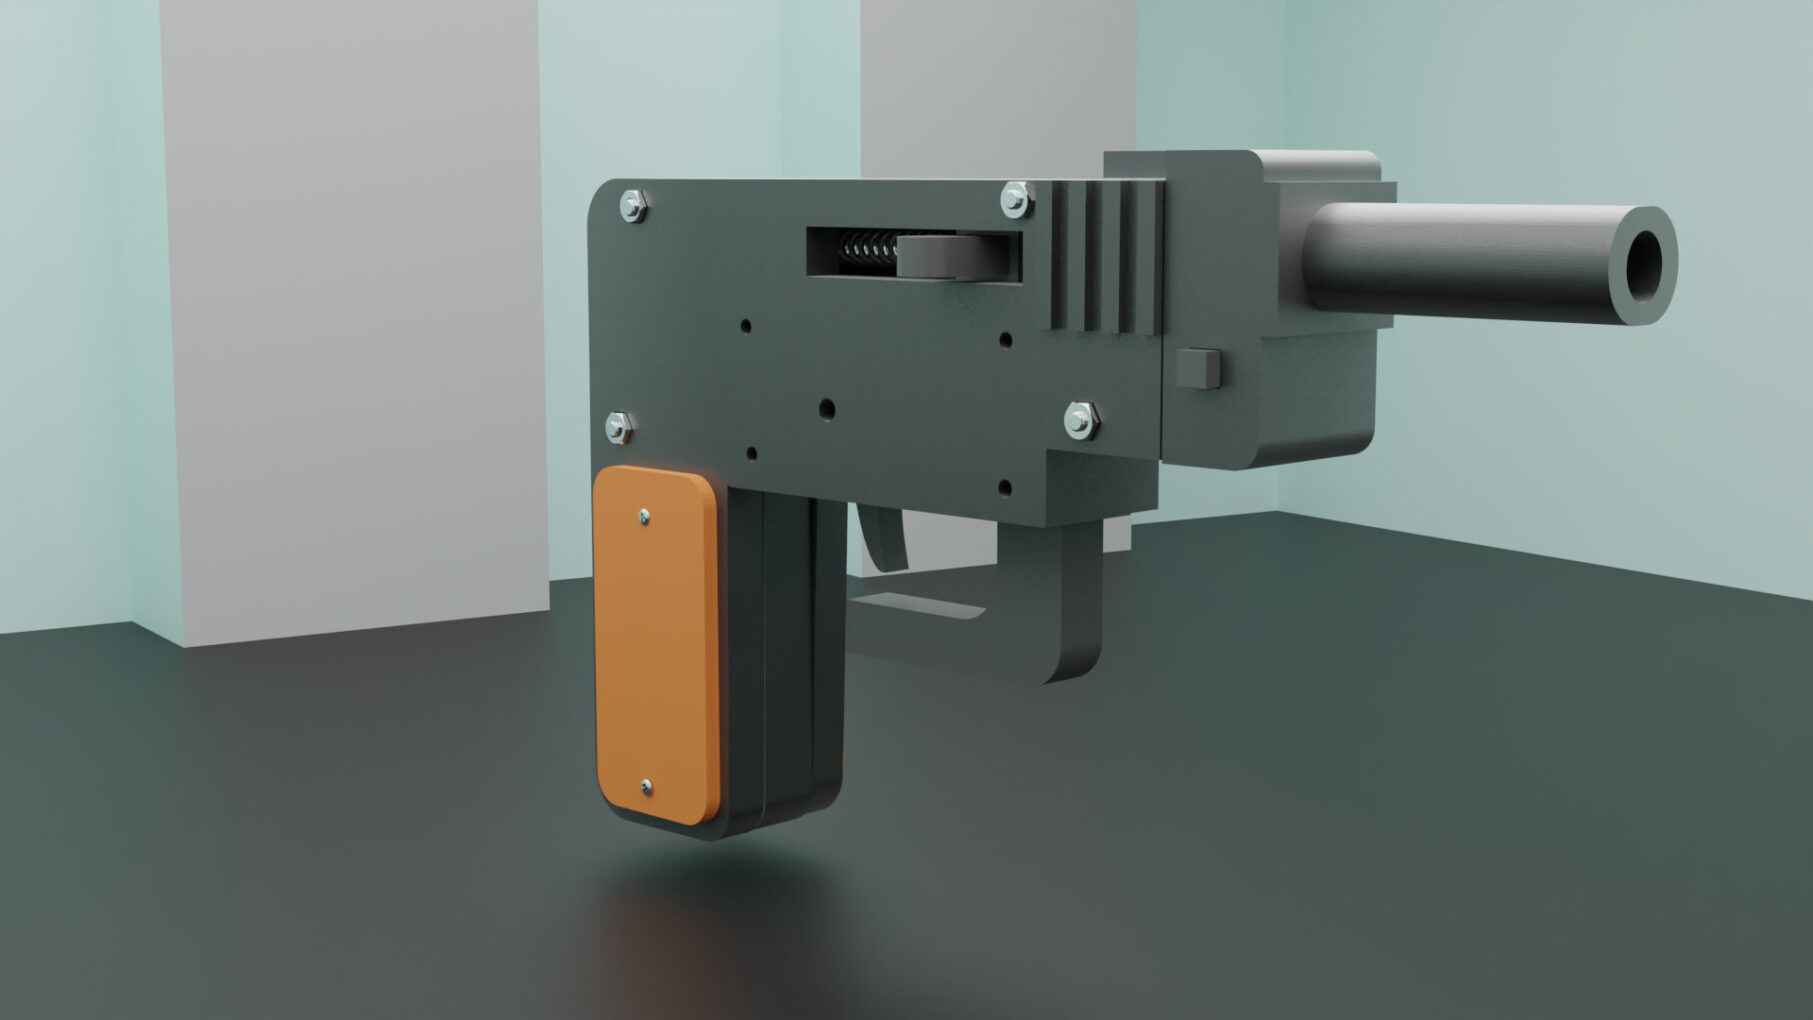
Unleash your creativity with this meticulously crafted 3D-printed gun model, designed for hobbyists and enthusiasts alike. This model boasts a modern, tactical design, featuring a combination of sleek lines and robust structural elements that make it both visually striking and fun to play with.
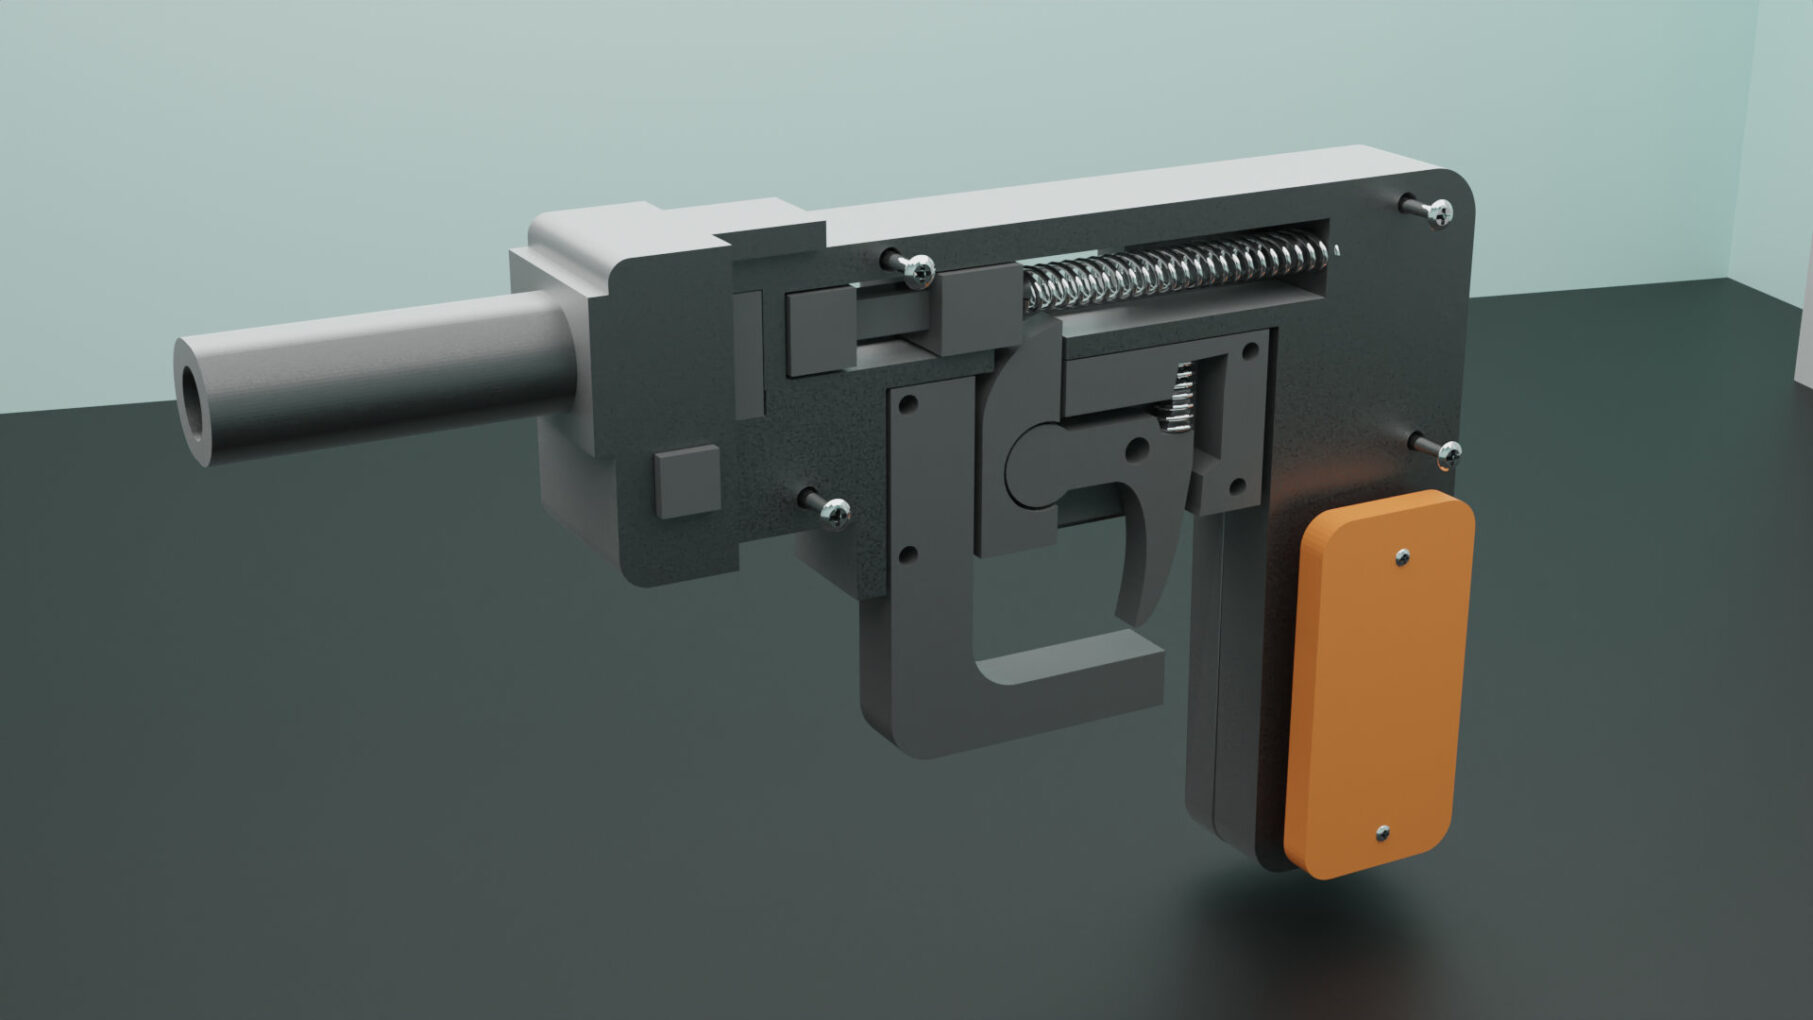
The 3d gun is designed with ergonomic grips for a comfortable hold, and includes functional details like a movable trigger and slide, adding an extra layer of realism to the experience. The assembly is user-friendly, with well-fitted parts that require minimal post-processing, making it an ideal project for both beginners and experienced 3D printing enthusiasts.
Perfect for cosplay, role-playing, or as an impressive display piece, this 3D-printed gun is versatile and durable, with a design that ensures smooth printing and easy assembly. The model is optimized for most standard 3D printers, with a focus on precision and detail, ensuring a high-quality final product that stands out.
The model is designed to be easily assembled post-printing, with minimal supports required for printing.
1. Optimal Layer Height
- Tip: Choose a layer height that balances detail and speed. For high-detail prints, use a smaller layer height (e.g., 0.1mm), and for faster prints or larger models, a thicker layer height (e.g., 0.2mm or 0.3mm) can be used.
2. Use Appropriate Infill Density
- Tip: Adjust the infill density based on the purpose of your print. For strong, functional parts, an infill of 20-50% works well, while decorative models can use 10-15% infill to save material and time.
3. Print Speed and Temperature
- Tip: Reduce print speed for more intricate details and sharper corners. For most PLA prints, a speed of 50-60 mm/s and a nozzle temperature of around 200°C are good starting points. Adjust according to your filament type.
4. Support Structures
- Tip: Use supports only where necessary to minimize post-processing. Consider using tree supports or adjusting overhang angles to reduce the need for supports. You can also set up custom supports in your slicer for more control.
5. Bed Adhesion
- Tip: Ensure good bed adhesion by using a brim or raft for small or complex prints. Adjust the first layer height and print speed to ensure it sticks well to the bed. Level your bed properly and consider using adhesives like glue stick or painter’s tape if needed.
6. Cooling Settings
- Tip: Enable cooling fans for PLA prints to improve overhangs and bridging. For ABS and other high-temp materials, reduce fan speed or turn it off to avoid warping.
7. Retraction Settings
- Tip: Tweak retraction settings to minimize stringing. A typical starting point is a retraction distance of 4-6mm and a retraction speed of 25-45 mm/s. Adjust based on the material and your printer’s performance.
8. Wall Thickness and Top Layers
- Tip: Increase wall thickness and add extra top layers for a stronger print and to avoid gaps in the top surface. A wall thickness of 1.2mm (3 lines with a 0.4mm nozzle) and 5-6 top layers are generally sufficient.
9. Optimize Supports for Easy Removal
- Tip: Use the “Support Z Distance” setting to create a small gap between the support structure and your model, making it easier to remove the supports without damaging the print.
10. Check for Print Time and Material Estimations
- Tip: Always check the estimated print time and material usage in your slicer to ensure you have enough filament and to plan your print accordingly. Adjust settings if the time is too long or if you want to save material.
These tips should help you get the most out of your 3D printing projects. Happy printing!